-edible zone-
Inspection:
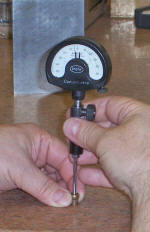
Above photo: checking the old bushing for wear in its precision bore. The gage has been set to read zero at .1875 inches. The technique is to measure in several areas of the bore to gather an overall impression of the condition. In the photo the reading indicates size to be .1879 inches. That was taken toward the upper end of the bore. At the lower end the size read .1882. Roundness was ok with no obvious variation.
The motor shaft outside diameter measures .1869 inches. Running clearance will be .001 - .0013 inches between the old bushing and shaft.A bit large on clearance.
* (note: these bushings have been sold out. Nowadays you can find
replacement motor bushings from a variety of sources.)
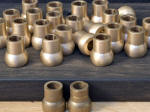
* Above photo foreground: The pair of old motor bushings. Background.
The new ones.
At that moment in time, (2007) it was virtually
impossible to source new bushings for the E-50 motor.......unless you
had some manufactured. That is what was done. I contracted with a local
toolmaker to cnc some new replacement bushings for the E50 motor.
Material for the new bushings was Oilite bronze, SAE 841. The material
in the old bushings was, well, old.
* (click thumbnail for full size image)
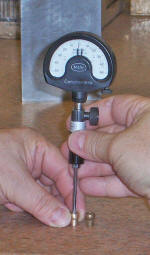
Checking size on the newly manufactured bushing. Reading is .1876 at every area within the bore. That is what I wanted. Running clearance will be .0007 inches between motor shaft and new bushing bores. Ready for another 50 years use.
*
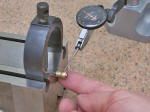 Nex bushing concentricity check: id to od. Read was less than .0005"
runout.
___________________________________________________horizontal rule
*Assembly
* Upper cover: The oem mounting post was secured by a solid rivent. To
replace it the rivet end is drilled out so we can use the new double
grommet post which will secured via hex bolt.
*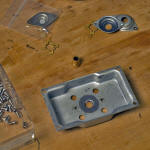 >ower cover: Cleandd and ready.
* Lower cover: Detail view of the spherical socket.
*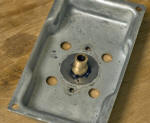 Lower cover: New bushing spherical end fits into the spherical socket of
the lower cover. To assist the self alignment process, a small amount of
high pressure grease is added to the joint. The bushing itself has been
impregnated with "Thorens Oil" by placing the bushings in a small tin
can, submerging them in the lube and baking them at 250 F for a few
hours.
* Lower cover: Oil retaining felt washer is placed around the bushing. The
felt has been soaked in 20 wt turbine oil. (Oil spec: Texaco Regal R&O
46) The oil is only sold in 5 gallon and larger containers. I should
have a lifetime supply...;-)
* Lower cover: The retaining cap holds another felt washer (also soaked in
Thorens oil)
* Lower cover: The retaining cap with retainer clip designed to fit the
spherical end of the bushing.
* Lower cover: The retaining cap in position.
* Lower cover: A new thrust pad (Delrin) is cut to replace the old heavily
indented original nylon pad. A slight amount of grease allows the pad to
stick into position as an assembly aid. Fasteners are M2.5 x .5mm
slotted cheese head screws and hex nuts.
* Lower cover: With bearing assembly fitted.
* Lower cover: Detail of the assembled thrust cap.
__________________________________________________________________horizontal rule
Putting the motor together: This assembly requires an alignment between both upper and lower case halves to be concentric to the motor shaft. Closely concentric so that the rotating part spins freely. And it won't unless we do.
*Text below is most recent update to my E50 assembly process.
After fastening the bearing assembly onto the lower case. The inner
cap tensions the bushing while allowing the bushing to swivel a small
amount within its spherical socket fitting. The m2.5 hex jam nuts were
carefully ,and somewhat tediously, fitted with my fingers to engage the
threads of the machine screws. Once the nuts had a 'start' on the
threads I used a screw driver to engage the slotted end of the screw
while holding the hex nut with a small plier. In this way I was able to
tighten the assembled bushing quite firmly to its end case. Do note that
the spherical end of the bushing must not be locked into position. It
must be able to swivel within its assembly. Test this by placing the
rotor shaft in the bushing and manipulate the bushing attitude using the
leverage of the rotor shaft. If the bushing puts up too much resistance
there is something within the assembly that is wrong.
The
bushing assembly is installed to the upper
case the same as the lower but with the exception that there is
no end cap. The rotor shaft fits through the upper case. Like the lower
case, it is important to insure that the upper bushing can be easily
swiveled within its spherical mount.
The importance of the swivel
mountings is for aligning the rotor shaft to the bushings. Ideally, upon
assembly, the rotor will spin within the upper and lower bushings only
touching a film of oil and not making hard contact with any part of the
bushings themselves.
* Don't forget about that thrust ball at the bottom thrust. It's 2mm
in diameter and might go unnoticed unless you're looking for it.
So we do. Hold it in the socket with a small dab of bearing grease.
*Before installing the motor to the chassis. And before applying
electricity to the motor. With the four assembly bolts not yet
tightened, slightly loose. Hold the motor in one hand. With the other
hand hold the top of the rotor shaft between thumb and forefinger.
Wiggle the shaft back and forth, around and forth, to operate the self
aligning bushings within the upper and lower casings in an operation
designed to align bushings upper and lower to the rotor shaft. Then,
spin the rotor shaft by giving a spin with the thumb/forefinger hand.
Observe how long the rotor spins. Repeat this process until the longest
spin-down time is achieved. Tighten the four bolts, then double check
the spin-down time. If longest spin-down time is achieved after
tightening the four bolts, you've got it.
editors note: It has
been my experience, after a few years of working on different TD124
players and seeing the variety of conditions that these motors may be
found to be in, I have revised my technique for final assembly as
follows.....
Noted above in the paragraph prior to this note, it
is in the hand-held assembly stage where the most effective method of
shaft centering can happen. When the upper and lower case bushings are
best aligned, there will be the longest spin-down time. When in good
alignment the rotor will free-spin for several seconds before coming to
a gradual halt.
- Some factors that affect free-spin times.
- Alignment between upper case bushing and lower case bushing. The apparent need for the two bushings to share same exact center-line with the shaft.
- Bushing wall to rotor-shaft operating clearances. This involves the diameter of the bushing compared to the diameter of the rotor shaft. The clearance between these two diameters must be held to a useful working tolerance. Tighter shaft/wall clearance results in shorter free spin. Greater shaft/wall clearance results in longer free-spin times due to less drag
- Lube viscosity. Greater viscosity (thicker) lube will produce higher amounts of drag against the rotor shaft and, all other things being equal, you get shorter free-spin. The opposite is to be expected for less viscous lube given no change in bushing wall to shaft working clearance..
- Rotor bearing thrust must be in good repair. A fresh thrust pad is always a good idea when restoring one of these E50 motors.
_________________________________________________________________horizontal rule
*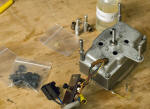 Assembled motor: This view shows the new Double Grommet posts installed
to the upper cover. The grommets and posts were sourced from Mirko
Djordjevic out of Huntington Beach, CA. Mirko manufacturers and / or
sources many oem parts for old Thorens, Garrard and Lenco turntables.
Quality of workmanship, as I've seen so far, looks very good. Prices are
reasonable.
* Fitting the grommets into the chassis.
*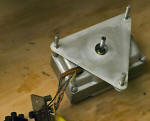 Assembled E-50 motor with shield and ready to fit into the chassis
* View from above: Assembled motor.
*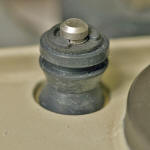 Close-up detail of the double grommet configuration.
*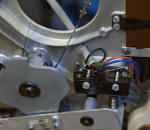
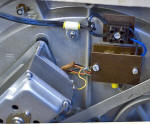 Last two photos: The electrical hook-ups.
*Next: E50 Stator Coils
